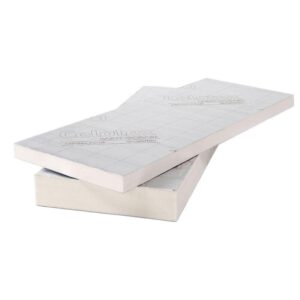
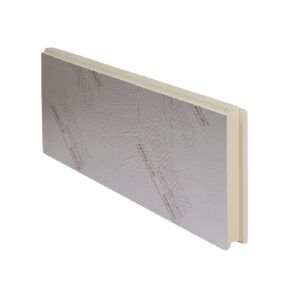
Celotex Insulation Board
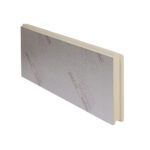
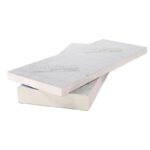
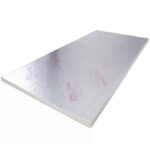
Celotex Insulation boards, also known as foam boards are a construction material carefully engineered to offer thermal insulation and added advantages like improvement of soundproofing and moisture prevention.
What are the Types of Celotex Insulation Boards?
Celotex Thermaclass Full Fill Cavity
An insulating material with exceptional thermal performance, Celotex Thermaclass Full Fill Cavity is made for cavity wall construction. This firm foam insulation board is carefully cut to fit tightly inside the wall cavity, filling the vacuum to stop heat loss. Building energy efficiency is increased, resulting in lower heating and cooling expenses, thanks to its strong thermal resistance (R-value). Thermaclass Full Fill Cavity by Celotex is renowned for its simplicity of installation and capacity to improve structures’ thermal comfort and total energy efficiency.
Celotex CW4000
Celotex CW400 is a PIR Insulation for Masonry Cavity Walls with Partial Fill board that offers high thermal performance and straightforward installation. It features a low emissivity foil front. It is available in thicknesses between 40mm and 100mm and may be used in partial fill cavity wall applications.
Celotex GA4000
This Insulation board offers dependable and long-lasting insulation solutions that aid in meeting current energy efficiency regulations. It is frequently used in roofs, walls, floors, and other locations where thermal insulation is essential. Thicknesses range from 50mm to 100mm.
Celotex TB4000
Energy efficiency criteria may be met with the help of reliable and durable insulation solutions from Celotex TB4000 PIR Insulation. It is typically utilised in places like floors, walls, and roofs where thermal insulation is crucial. The range of thicknesses is 20 to 40 mm.
Celotex XR4000
Celotex TB4000 PIR Insulation will help you meet energy efficiency requirements. It is often used where thermal insulation is important, such as on floors, walls, and roofs. Thickness ranges between 110mm and 150mm.
Celotex PL4000
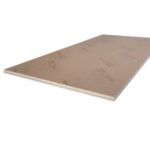
Insulation and plasterboard (drywall) are both components of the building material known as Celotex pl4000 insulated plasterboard. It is intended to make the insulation and finishing of interior walls and ceilings for building and restoration projects simpler. The product’s core is constructed of stiff insulation material, frequently polyisocyanurate (PIR) foam, which has the qualities of thermal insulation. By minimising heat movement via walls and ceilings, this insulating layer enhances a building’s energy efficiency. Plasterboard Facing: The completed surface for walls or ceilings is a layer of plasterboard that is attached to one side of the insulated plasterboard. It is designed for easy installation and finishing, including painting or wallpapering.
Key features and characteristics of Celotex insulation board:
- Thermal Values: The main goal of insulation boards is to lessen heat transmission from a building’s interior to its outside. Their R-value, which gauges a material’s heat resistance, is high. R-value increases are a sign of greater insulation.
- Easy Insulation: Installation is generally easier because insulation boards are typically lightweight and portable. They are frequently used in conjunction with other insulation products and architectural elements and may be trimmed to meet specified measurements.
- Durability: Insulation boards are excellent for a variety of applications, including walls, roofs, floors, and foundations, due to their rigidity and durability. They can hold their form and retain their insulating qualities over time because of their stiffness.
- Versatility: To meet diverse building demands, insulation boards are available in a variety of sorts, thicknesses, and sizes. They can be included in renovations of already-built structures or employed in brand-new construction projects.
- Energy Efficiency: By lowering the demand for heating and cooling, insulation boards considerably improve a building’s energy efficiency. Savings in energy costs may result from this.
How to install Celotex Insulation board?
When using PIR (Polyisocyanurate) insulation boards to insulate walls, roofs, floors or other parts of a structure, the boards must be installed correctly to form a thermal barrier.
Tools and Materials You Might Need:
- Boards for PIR insulation
- A saw or utility knife
- Measurement tape
- A level or straightedge
- Glue (if required)
- Fixtures (if required, screws or nails)
- Vapour barrier
- Gloves, safety glasses, and a dust mask)
Insulating using a PIR insulation board is a crucial step in improving the energy efficiency and thermal comfort of your building.
Here’s a comprehensive guide on how to do it effectively:
- Safety First: Before you begin, prioritise safety. Ensure you’re wearing appropriate safety gear, including gloves, safety glasses, and a dust mask, to protect yourself from any potential dust and debris generated during the installation process.
- Surface Preparation: The success of your insulation project starts with the surface. Make sure the area where you intend to install the PIR insulation boards is clean, dry, and free from any obstacles that might hinder proper installation.
- Measuring and Cutting: Measure the space where you’ll be placing the insulation boards and cut them to the required size with precision. A utility knife or saw is commonly used for this purpose. Accuracy in your cuts is essential to ensure a snug fit without any gaps.
How to fit Celotex Insulation Board?
- Positioning the Boards: Carefully position the cut PIR insulation boards into the designated areas. Ensure they fit tightly, without any visible gaps or spaces. If needed, you can secure the boards in place using appropriate fixings, such as screws or nails.
- Sealing Joints and Gaps: To maximise the insulation’s effectiveness, it’s crucial to seal any joints or gaps between the insulation boards. You can use specialised insulation tape or sealant for this purpose. This step helps maintain the insulation’s integrity and prevents heat loss or the infiltration of cold air.
- Vapor Barrier (if necessary): Depending on your local building codes and prevailing climate conditions, you may need to install a vapour barrier over the PIR insulation boards. A vapour barrier helps manage moisture and condensation, contributing to a healthier indoor environment. Always follow the specific guidelines and regulations in your area regarding vapour barrier installation.
- Additional Layers (if required): In some cases, achieving the desired level of thermal resistance (R-value) may require the installation of multiple layers of PIR insulation boards. Ensure that each layer is properly staggered to avoid thermal bridging, which can compromise the insulation’s performance.
- Surface Finish: Once the insulation is in place, you can proceed to finish the surface as needed. For example, in walls, you can install drywall or other wall coverings; in roofs, roofing materials can be added, and for floors, subflooring or flooring materials can be applied.
- Code Compliance: To ensure your insulation project meets local building codes and regulations, always check with your local authorities or building inspector. Compliance is essential to maintain the safety and energy efficiency of your structure.
- Professional Guidance: If you ever feel uncertain about any aspect of the insulation installation, consider seeking assistance from a professional contractor or insulation expert. Their expertise can help ensure a successful project that meets all necessary standards.
Conclusion
You can effectively install PIR insulation boards, contributing to a more energy-efficient and comfortable indoor environment while adhering to safety and building code requirements.
Please don’t hesitate to contact our dedicated sales team on 0203 318 7316 or by email at [email protected] if you need any assistance with your purchase.
Showing 1–24 of 27 results
-
100mm Celotex CW4100 Cavity Wall Insulation Board 1200mm x 450mm 3.24m2 Pack of 6
100mm Celotex CW4100 Cavity Wall Insulation Board is an easy to install polyisocyanurate (PIR) insulation board with excellent thermal performance, featuring a low emissivity foil facing.
£58.00 £69.60 Inc VAT£9.67 Per Sheet Add to cart -
100mm Celotex GA4100 PIR Insulation Board 2400mm x 1200mm (8′ x 4′)
100mm Celotex GA4100 is a polyisocyanurate (PIR) insulation core with composite aluminium foil facings on both sides. Celotex is a multi-purpose insulation board suitable for use in pitched roofs, ceilings, floors and walls.
£31.00 £37.20 Inc VAT Add to cart -
110mm Celotex XR4110 PIR Insulation Board 2400mm x 1200mm (8′ x 4′)
110mm Celotex XR4110 is a polyisocyanurate (PIR) insulation core with composite aluminium foil facings on both sides. Celotex is a multi-purpose insulation board suitable for use in pitched roofs, ceilings, floors and walls.
£41.18 £49.42 Inc VAT Add to cart -
115mm Celotex Thermaclass Cavity Wall 21 Insulation Board 1190mm x 450mm Pack of 5
115mm Celotex Thermaclass Cavity Wall 21 is a PIR T&G insulation board designed for full-fill cavity wall applications. Low-emissivity foil facing provides versatility during installation, allowing for a 10mm residual cavity.
£94.00 £112.80 Inc VAT£18.80 Per Sheet Add to cart -
120mm Celotex XR4120 PIR Insulation Board 2400mm x 1200mm (8′ x 4′)
120mm Celotex XR4120 is a polyisocyanurate (PIR) insulation core with composite aluminium foil facings on both sides. Celotex is a multi-purpose insulation board suitable for use in pitched roofs, ceilings, floors and walls.
£38.00 £45.60 Inc VAT Add to cart -
130mm Celotex XR4130 PIR Insulation Board 2400mm x 1200mm (8′ x 4′)
130mm Celotex XR4130 is a polyisocyanurate (PIR) insulation core with composite aluminium foil facings on both sides. Celotex is a multi-purpose insulation board suitable for use in pitched roofs, ceilings, floors and walls.
£46.00 £55.20 Inc VAT Add to cart -
140mm Celotex XR4140 PIR Insulation Board 2400mm x 1200mm (8′ x 4′)
140mm Celotex XR4140 is a polyisocyanurate (PIR) insulation core with composite aluminium foil facings on both sides. Celotex is a multi-purpose insulation board suitable for use in pitched roofs, ceilings, floors and walls.
£46.88 £56.26 Inc VAT Add to cart -
150mm Celotex XR4150 PIR Insulation Board 2400mm x 1200mm (8′ x 4′)
150mm Celotex XR4150 is a polyisocyanurate (PIR) insulation core with composite aluminium foil facings on both sides. Celotex is a multi-purpose insulation board suitable for use in pitched roofs, ceilings, floors and walls.
£48.99 £58.79 Inc VAT Add to cart -
25mm Celotex PIR Insulated Plasterboard 1200mm x 2400mm + 12.5mm P/B
25mm + 12.5mm Celotex PL4025 PIR Insulated Plasterboard is it is suitable for use in roof and internal wall lining applications. Celotex Insulated Plasterboard is a high performance, easy to install PIR insulation board with a paper facing, laminated to a piece of 12.5mm tapered edge plasterboard.
£33.33 £40.00 Inc VAT Add to cart -
25mm Celotex TB4025 PIR Insulation Board 2400mm x 1200mm (8′ x 4′)
25mm Celotex TB4025 is a polyisocyanurate (PIR) insulation core with composite aluminium foil facings on both sides. Celotex is a multi-purpose insulation board suitable for use in pitched roofs, ceilings, floors and walls.
£12.12 £14.54 Inc VAT Add to cart -
30mm Celotex TB4030 PIR Insulation Board 2400mm x 1200mm (8′ x 4′)
30mm Celotex TB4030 is a polyisocyanurate (PIR) insulation core with composite aluminium foil facings on both sides. Celotex is a multi-purpose insulation board suitable for use in pitched roofs, ceilings, floors and walls.
£13.33 £16.00 Inc VAT Add to cart -
40mm Celotex PIR Insulated Plasterboard 1200mm x 2400mm + 12.5mm P/B
40mm Celotex PL4040 PIR Insulated Plasterboard is it is suitable for use in roof and internal wall lining applications. Celotex Insulated Plasterboard is a high performance, easy to install PIR insulation board with a paper facing, laminated to a piece of 12.5mm tapered edge plasterboard.
£40.00 £48.00 Inc VAT Add to cart -
40mm Celotex TB4040 PIR Insulation Board 2400mm x 1200mm (8′ x 4′)
40mm Celotex TB4040 is a polyisocyanurate (PIR) insulation core with composite aluminium foil facings on both sides. Celotex is a multi-purpose insulation board suitable for use in pitched roofs, ceilings, floors and walls.
£18.00 £21.60 Inc VAT Add to cart -
50mm Celotex CW4050 Cavity Wall Insulation Board 1200mm x 450mm 5.94m2 Pack of 11
50mm Celotex CW4050 Cavity Wall Insulation Board is an easy to install polyisocyanurate (PIR) insulation board with excellent thermal performance, featuring a low emissivity foil facing.
£58.00 £69.60 Inc VAT£5.27 Per Sheet Add to cart -
50mm Celotex GA4050 PIR Insulation Board 2400mm x 1200mm (8′ x 4′)
50mm Celotex GA4050 is a polyisocyanurate (PIR) insulation core with composite aluminium foil facings on both sides. Celotex is a multi-purpose insulation board suitable for use in pitched roofs, ceilings, floors and walls.
£17.48 £20.98 Inc VAT Add to cart -
50mm Celotex PIR Insulated Plasterboard 1200mm x 2400mm + 12.5mm P/B
50mm + 12.5mm Celotex PL4050 PIR Insulated Plasterboard is it is suitable for use in roof and internal wall lining applications. Celotex Insulated Plasterboard is a high performance, easy to install PIR insulation board with a paper facing, laminated to a piece of 12.5mm tapered edge plasterboard.
£46.00 £55.20 Inc VAT Add to cart -
60mm Celotex CW4060 Cavity Wall Insulation Board 1200mm x 450mm 5.4m2 Pack of 10
60mm Celotex CW4060 Cavity Wall Insulation Board is an easy to install polyisocyanurate (PIR) insulation board with excellent thermal performance, featuring a low emissivity foil facing.
£61.88 £74.26 Inc VAT£6.19 Per Sheet Add to cart -
60mm Celotex GA4060 PIR Insulation Board 2400mm x 1200mm (8′ x 4′)
60mm Celotex GA4060 is a polyisocyanurate (PIR) insulation core with composite aluminium foil facings on both sides. Celotex is a multi-purpose insulation board suitable for use in pitched roofs, ceilings, floors and walls.
£24.48 £29.38 Inc VAT Add to cart -
60mm Celotex PIR Insulated Plasterboard 1200mm x 2400mm + 12.5mm P/B
60mm + 12.5mm Celotex PL4060 PIR Insulated Plasterboard is it is suitable for use in roof and internal wall lining applications. Celotex Insulated Plasterboard is a high performance, easy to install PIR insulation board with a paper facing, laminated to a piece of 12.5mm tapered edge plasterboard.
£53.33 £64.00 Inc VAT Add to cart -
70mm Celotex GA4070 PIR Insulation Board 2400mm x 1200mm (8′ x 4′)
70mm Celotex GA4070 is a polyisocyanurate (PIR) insulation core with composite aluminium foil facings on both sides. Celotex is a multi-purpose insulation board suitable for use in pitched roofs, ceilings, floors and walls.
£24.68 £29.62 Inc VAT Add to cart -
75mm Celotex CW4075 Cavity Wall Insulation Board 1200mm x 450mm 4.32m2 Pack of 8
75mm Celotex CW4075 Cavity Wall Insulation Board is an easy to install polyisocyanurate (PIR) insulation board with excellent thermal performance, featuring a low emissivity foil facing.
£61.00 £73.20 Inc VAT£7.63 Per Sheet Add to cart -
75mm Celotex GA4075 PIR Insulation Board 2400mm x 1200mm (8′ x 4′)
75mm Celotex GA4075 is a polyisocyanurate (PIR) insulation core with composite aluminium foil facings on both sides. Celotex is a multi-purpose insulation board suitable for use in pitched roofs, ceilings, floors and walls.
£25.00 £30.00 Inc VAT Add to cart -
80mm Celotex GA4080 PIR Insulation Board 2400mm x 1200mm (8′ x 4′)
80mm Celotex GA4080 is a polyisocyanurate (PIR) insulation core with composite aluminium foil facings on both sides. Celotex is a multi-purpose insulation board suitable for use in pitched roofs, ceilings, floors and walls.
£27.62 £33.14 Inc VAT Add to cart -
90mm Celotex GA4090 PIR Insulation Board 2400mm x 1200mm (8′ x 4′)
90mm Celotex GA4090 is a polyisocyanurate (PIR) insulation core with composite aluminium foil facings on both sides. Celotex is a multi-purpose insulation board suitable for use in pitched roofs, ceilings, floors and walls.
£31.00 £37.20 Inc VAT Add to cart
