Products in Plastic Render Beads
-

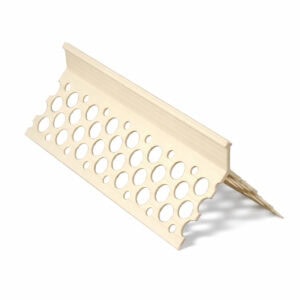
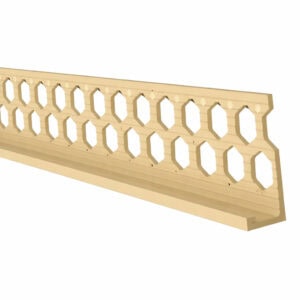
10mm Ivory Plastic Angle Bead 2.5m Pack of 50
10mm Ivory Plastic Angle Bead / Corner bead for use on all external/internal rendering and plastering applications. Plastic Angle Beads are applicable for corners where a strong, true and sharp corner is needed.
£144.80£173.76 Ex VATInc VAT£2.90£3.48 Per Unit Add to cart -
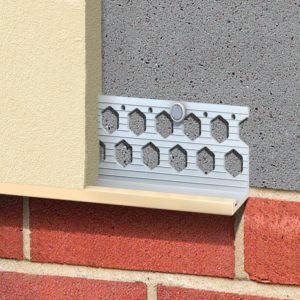
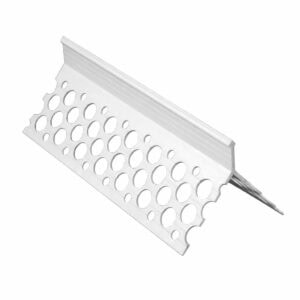
10mm Ivory Plastic Bellcast Bead 2.5m Pack of 50
10mm Ivory Bellcast beads also known as drip beads are designed for function and speed on all external rendering applications. Discreet but strong, all beading gives a perfect finish to through colour render and is equally suitable for sand and cement.
£144.80£173.76 Ex VATInc VAT£2.90£3.48 Per Unit Add to cart -
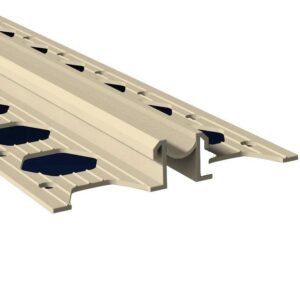
10mm Ivory Plastic Movement Bead 2.5m Pack of 50
10mm Ivory Plastic Movement Bead/ expansion joints are designed for areas of render over 20 square metres and should be specified every 4-6 metres, over structural movement joints and changes of background. . Discreet but strong, all beading gives a perfect finish to through colour render and is equally suitable for sand and cement.
£277.44£332.93 Ex VATInc VAT£5.55£6.66 Per Unit Add to cart -
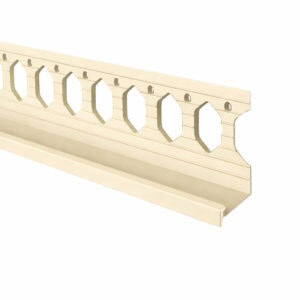
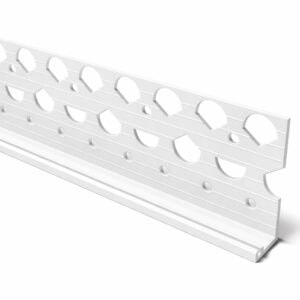
10mm Ivory Plastic Stop Bead 2.5m Pack of 50
The Ivory Plastic Stop Beads are designed for function with all standard rendering and internal plastering applications, external wall insulation, timber frame, and other weatherboard systems. Provides a straight edge and stop to the render at changes of finish and up to doors and windows.
£144.80£173.76 Ex VATInc VAT£2.90£3.48 Per Unit Add to cart -
10mm White Plastic Angle Bead 2.5m Pack of 50
10mm White Plastic Angle Bead / Corner bead for use on all external/internal rendering and plastering applications. Plastic Angle Beads are applicable for corners where a strong, true and sharp corner is needed.
£127.02£152.42 Ex VATInc VAT£2.54£3.05 Per Unit Add to cart -
10mm White Plastic Bellcast Bead 2.5m Pack of 50
10mm White Bellcast beads also known as drip beads are designed for function and speed on all external rendering applications. Discreet but strong, all beading gives a perfect finish to through colour render and is equally suitable for sand and cement.
£127.02£152.42 Ex VATInc VAT£2.54£3.05 Per Unit Add to cart -
10mm White Plastic Movement Bead 2.5m Pack of 50
10mm White Plastic Movement Bead/ expansion joints are designed for areas of render over 20 square metres and should be specified every 4-6 metres, over structural movement joints and changes of background. . Discreet but strong, all beading gives a perfect finish to through colour render and is equally suitable for sand and cement.
£240.97£289.16 Ex VATInc VAT£4.82£5.78 Per Unit Add to cart -
10mm White Plastic Stop Bead 2.5m Pack of 50
The White Plastic Stop Beads are designed for function with all standard rendering and internal plastering applications, external wall insulation, timber frame, and other weatherboard systems. Provides a straight edge and stop to the render at changes of finish and up to doors and windows.
£127.02£152.42 Ex VATInc VAT£2.54£3.05 Per Unit Add to cart -
15mm Ivory Plastic Angle Bead 2.5m Pack of 50
15mm Ivory Plastic Angle Bead / Corner bead for use on all external/internal rendering and plastering applications. Plastic Angle Beads are applicable for corners where a strong, true and sharp corner is needed.
£150.21£180.25 Ex VATInc VAT£3.00£3.60 Per Unit Add to cart -
15mm Ivory Plastic Bellcast Bead 2.5m Pack of 50
15mm Ivory Bellcast beads also known as drip beads are designed for function and speed on all external rendering applications. Discreet but strong, all beading gives a perfect finish to through colour render and is equally suitable for sand and cement.
£144.17£173.00 Ex VATInc VAT£2.88£3.46 Per Unit Add to cart -
15mm Ivory Plastic Movement Bead 2.5m Pack of 50
15mm Ivory Plastic Movement Bead / expansion joints are designed for areas of render over 20 square metres and should be specified every 4-6 metres, over structural movement joints and changes of background. . Discreet but strong, all beading gives a perfect finish to through colour render and is equally suitable for sand and cement.
£295.59£354.71 Ex VATInc VAT£5.91£7.09 Per Unit Add to cart -
15mm Ivory Plastic Stop Bead 2.5m Pack of 50
The Ivory Plastic Stop Beads are designed for function with all standard rendering and internal plastering applications, external wall insulation, timber frame, and other weatherboard systems. Provides a straight edge and stop to the render at changes of finish and up to doors and windows.
£150.21£180.25 Ex VATInc VAT£3.00£3.60 Per Unit Add to cart -
15mm White Plastic Movement Bead 2.5m Pack of 50
15mm White Plastic Movement Bead / expansion joints are designed for areas of render over 20 square metres and should be specified every 4-6 metres, over structural movement joints and changes of background. . Discreet but strong, all beading gives a perfect finish to through colour render and is equally suitable for sand and cement.
£257.19£308.63 Ex VATInc VAT£5.14£6.17 Per Unit Add to cart -
15mm White Plastic Stop Bead 2.5m Pack of 50
The White Plastic Stop Beads are designed for function with all standard rendering and internal plastering applications, external wall insulation, timber frame, and other weatherboard systems. Provides a straight edge and stop to the render at changes of finish and up to doors and windows.
£130.75£156.90 Ex VATInc VAT£2.62£3.14 Per Unit Add to cart -
15mm White Plastic Bellcast Bead 2.5m Pack of 50
15mm White Bellcast beads also known as drip beads are designed for function and speed on all external rendering applications. Discreet but strong, all beading gives a perfect finish to through colour render and is equally suitable for sand and cement.
£119.08£142.90 Ex VATInc VAT£2.38£2.86 Per Unit Get restock alert